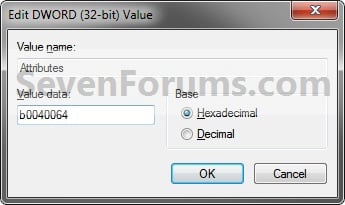
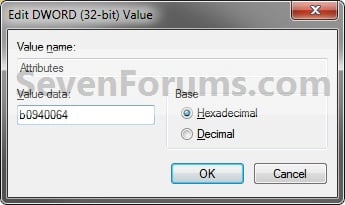
Worked for me:
Now... what is not widely known is this next trick for 7
If you want to continue using 7 for free (compliments of MS).. you simply change this reg key and you can continue to rearm for a fresh 30 days continuously!
[HKEY_LOCAL_MACHINE\SOFTWARE\Microsoft\Windows NT\CurrentVersion\SoftwareProtectionPlatform]
"SkipRearm"=dword:00000001
After your 3rd reset this key will be 00000000 - simply change it as above to 00000001 -- now you can rearm again! Just keep doing this as long as you like
Resetting the rearm count in Windows 7
9 JANUARY 2013 4 COMMENTS
After installing Windows 7, and before activation, the operating system will run in an Initial Grace Period license status for 30 days. When this grace period expires, users can rearm Windows 7 for an additional 30 days, and do this up to 3 times, effectively allowing the OS to run legally for 120 days without a genuine product key.
When a user uses up all three rearms available rearms, the only option left is to enter a genuine product key to activate Windows 7, or leave the operating system in a crippled, non-genuine state. Users will then be subjected to certain annoyances such as black desktop background, repetitive notification messages stating that this copy of Windows is illegal or counterfeited, and a reminder to register the software at login.
Through a Windows Product Activation (WPA) vulnerability that Microsoft introduced in Windows 7, it is possible to reset the remaining rearm count back to 4. There is no limit to the number of times that the rearm count can be reset, meaning that a user could theoretically run an unlicensed copy of Windows 7 forever, without the need for proper activation, and without applying any activation hacks.
This WPA vulnerability is related to a WPA registry key which contains the ‘Last Rearm Time’. When the WPA registry key is deleted, the whole licensing status of Windows 7 is re-initiated to the Initial Grace Period as if Windows 7 has just been installed. The deletion of the WPA registry key is achieved via the following command:
reg load HKLM\MY_SYSTEM “%~dp0Windows\System32\config\system”
reg delete HKLM\MY_SYSTEM\WPA /f
reg unload HKLM\MY_SYSTEM
Given the importance of this WPA registry key, Microsoft has locked it (and its sub-keys) from been modified or deleted in a normal user session. The only way to run this command is within the WinRE (Windows Recovery Environment) or WinPE (Windows Preinstallation Environment).
In our managed environment, this method of rearming Windows is ultra handy in our SOE creation, in that we do not have to keep starting from scratch when we run out of rearms. This ‘hard’ rearm reset gives us one less thing to worry about if we need to tweak anything in our images.
To perform this ‘hard’ reset; create a batch script file with the following commands:
reg load HKLM\MY_SYSTEM "%~dp0Windows\System32\config\system"Save the file as delwpa.bat on drive C:\ at the root folder level. For example, C:\delwpa.bat. Note that some users may require to run the text editor such as Notepad as administrator to save to C:\ root directory.
reg delete HKLM\MY_SYSTEM\WPA /f
reg unload HKLM\MY_SYSTEM- Restart the computer.
- Press F8 right after the BIOS screen to get to the “Advanced Boot Options”.
- Select Repair Your Computer.
- Select your keyboard input method, and click Next.
- Enter user name and password login credentials, and click OK.
- In the “System Recovery Options”, open Command Prompt.
- Type C: to go to the main drive, and the execute the delwpa.bat file by typing its name:
delwpa.batNote: On some computers such as virtual machine or computer with recovery partition, the main drive may have another drive letter, e.g. D: - The console should display messages saying that the commands were executed successfully. Close the console window and reboot the machine.
- After system start-up, log into Windows. Your system will display message such as “This product is not genuine”. Just ignore it.
- To check the activation status, open an elevated command prompt window as administrator, and run the following command:slmgr /dlvThe dialog box with the following details should appear:
License Status: Initial Grace Period
Time remaining: 30 days
Remaining windows rearm count: 3
Tip: As an alternative, it’s possible boot from a Windows 7 Repair Disc or a Windows 7 installation disc to go to WinPE environment. This method will bypass the need to enter login credentials. Pressing F8 will bring user to WinRE console.
Reset Windows 7 Rearm count and run indefinitely without crack
Reset Windows 7 Rearm count and run indefinitely without crack
Rearm extends your Windows 7 activation and runs a countdown of 30 days. In this period, you need to activate it (which is generally cracked). Well, you can reset your Rearm count and run Windows 7 forever without cracking it actually. The process is not very complicated but requires little patience.
Many users may have left stranded after last Windows 7 update WAT – KB971033 for fighting against cracks and illegal activations. But using this trick by MDL Forum, you will be able to reset rearm count to infinity and use Windows 7 original forever without crack and downloading all Windows updated calmly.
Many users may have left stranded after last Windows 7 update WAT – KB971033 for fighting against cracks and illegal activations. But using this trick by MDL Forum, you will be able to reset rearm count to infinity and use Windows 7 original forever without crack and downloading all Windows updated calmly.
Now let’s start: First, open Start and in the search field type services. On the opening of new window, find “Software Protection“, Right click on it and Stop.
Now Let’s go to C:\Windows\ServiceProfiles\NetworkService\AppData\ Roaming\Microsoft\SoftwareProtectionPlatform Right click file tokens.dat, We select Cut andpaste it to your Desktop.
After doing this too, Go to C: Windows\System32. At this point we look for two hidden files, which by extension will have. C7483456-A289-439d-8115-601632D005A0. Once found, move them to your desktop. If you can not view them, you set the Show Hidden Files from Folder Options.
Now we return to the first step, in which I asked you to open Services After searching Start it. At this point keep the window open and in the meantime start the Command Prompt asAdministrator and enter the command slmgr / dlv. Now back to the screen that you left open, head back to Software Protection and Start.
But now let’s concentrate on the three files that we pasted on the desktop. Replace them in their original positions, overwrite token.dat in C:\Windows\ServiceProfiles\NetworkService\AppData\ Roaming\Microsoft\SoftwareProtectionPlatform
the other 2 are placed in C:\WindowsSystem32.
the other 2 are placed in C:\WindowsSystem32.
Now, we are performing another important step of entering product keys for rearming. Open the Command Prompt as administrator like we always did. Run “slmgr /ipk XXXXX-XXXXX-XXXXX-XXXXX-XXXXX” replacing X marks with your default product key. Keys are as follows:
Ultimate – D4F6K-QK3RD-TMVMJ-BBMRX-3MBMV
Professional – HYF8J-CVRMY-CM74G-RPHKF-PW487
Home Premium – RHPQ2-RMFJH-74XYM-BH4JX-XM76F
Home Basic – YGFVB-QTFXQ-3H233-PTWTJ-YRYRV
Starter – 7Q28W-FT9PC-CMMYT-WHMY2-89M6G
Professional – HYF8J-CVRMY-CM74G-RPHKF-PW487
Home Premium – RHPQ2-RMFJH-74XYM-BH4JX-XM76F
Home Basic – YGFVB-QTFXQ-3H233-PTWTJ-YRYRV
Starter – 7Q28W-FT9PC-CMMYT-WHMY2-89M6G
The most important part was done, we can now reboot the pc. After turning on your computer, you can check whether the command was executed, then open the command prompt and typeslmgr / dlv to check if the meter is actually restarted.


